
Priya Shah, Staff Writer.
You are standing at the bathroom mirror with three half-used bottles of foundation, none of them quite right. One oxidizes orange by lunch. One sits gray in the fine lines by the eyes. One looked perfect under the fluorescent lights at the counter and wrong the second you stepped outside. If you have typed “best full coverage foundation for oily skin” or “why does my foundation turn orange” into a search bar at midnight, this guide is for you.
Here is the fact that changes most of that frustration: foundation shade is not one variable, it is two. Undertone (how warm, cool, or neutral your skin reads) and depth (how light or dark) have to match separately, and most shade-matching mistakes happen because a shopper solves for depth and ignores undertone entirely. Get both right and even a modest formula looks convincing. Get either wrong and no amount of coverage fixes it.
This is not a ranking and there is nothing to buy at the end. It is a working method: how coverage actually behaves on skin, where drugstore and department-counter formulas genuinely differ, and where the difference is mostly marketing.
- Undertone and depth are two separate decisions, and matching only one is the most common reason a shade looks wrong within hours.
- Skin prep changes how any formula performs far more than the formula’s price point does, according to dermatologists.
- Climate dictates technique: what sets beautifully in a dry winter apartment can slide by noon in a humid East Coast summer.
Why Full Coverage Is Harder To Buy Than It Looks
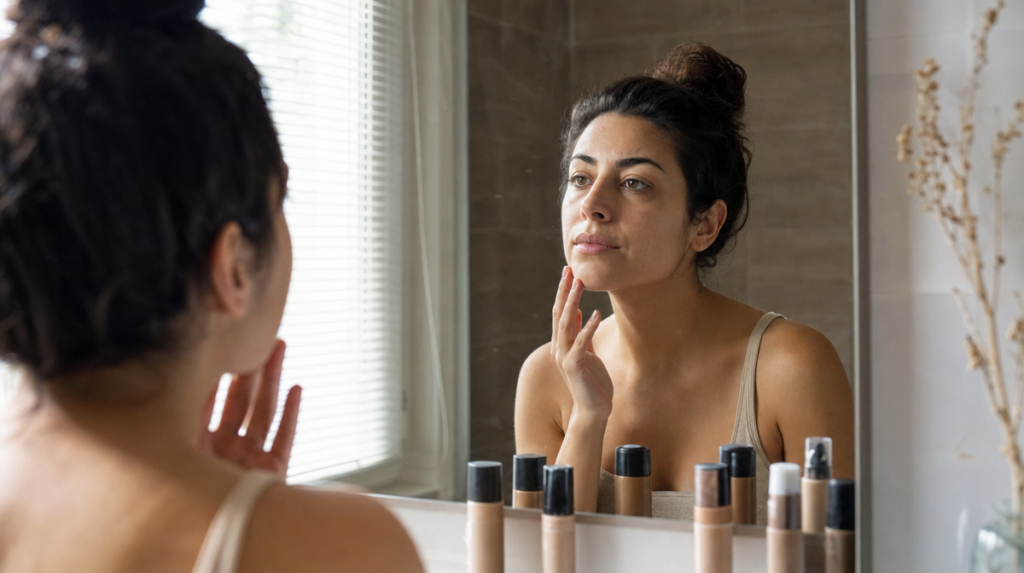
Full-coverage liquid foundation asks more of a formula than a tinted moisturizer or a BB cream does. It needs enough pigment to mask redness, dark spots, or scarring while still moving with the face when you talk or smile. That balance is a real formulation problem, not a marketing one.
“The higher the pigment load, the more the formula has to work to stay flexible on skin instead of sitting on top of it like a coat of paint,” said Dr. James Morrison, PhD, Biochemist. Too little of the right binding ingredient and a heavy formula cracks into fine lines by afternoon. Too much and it feels greasy within the hour.
A 2022 consumer survey conducted for the American Academy of Dermatology found that a majority of adult women reported owning at least one foundation they no longer use because the shade or finish looked wrong after purchase, most commonly citing oxidation or a mismatch seen only in daylight. That single statistic explains most of the bottles lined up on your counter. The fix is rarely a better product. It is usually a better process for choosing and applying the one you already own.
Finding Your Undertone In Daylight
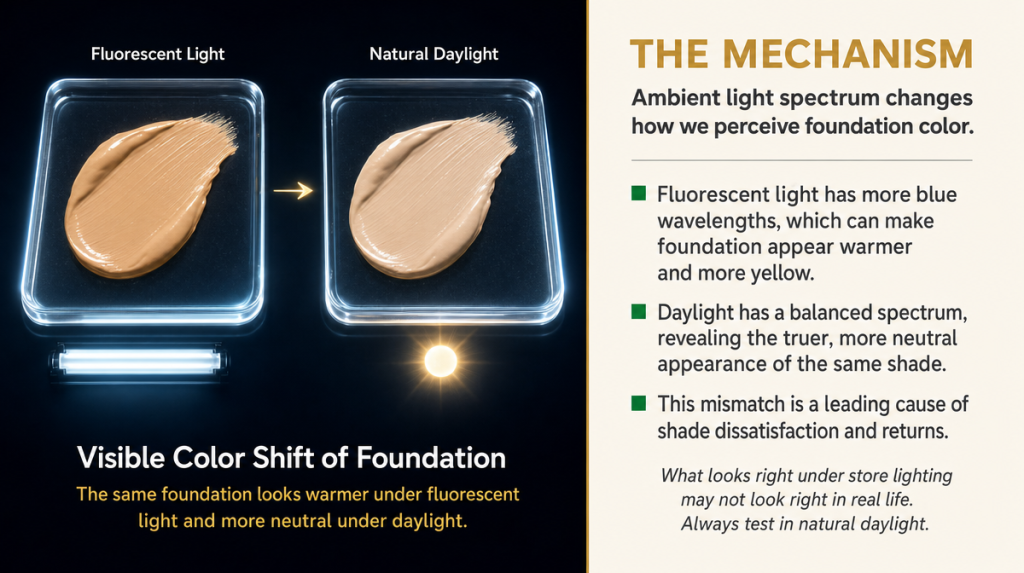
Undertone is the warm, cool, or neutral cast beneath the skin’s surface color, and it does not change with a tan or a season, though how visible it is can shift slightly. The surest way to see it: step near a window in natural daylight, without makeup, and look at the inside of your wrist and your jawline together. Warm undertones lean golden or peachy. Cool undertones lean pink or slightly blue. Neutral sits between the two, which is common and not a compromise.
Store lighting is the enemy here. Fluorescent bulbs and the yellow-toned lighting common at many drugstore beauty aisles both distort color rendering enough to make an accurate match difficult. If you are shade-matching in person, ask to step outside or near an entrance for a few seconds before deciding.
Self-test: hold a foundation swatch against your jaw, not your hand, and check it in daylight against a mirror at a slight distance. If the swatch seems to “disappear” into the skin rather than sit as a visible stripe, the undertone is close. If it looks chalky or ashy, the undertone is too cool for your skin. If it looks orange within a minute, it is too warm or it is oxidizing, which is a separate problem addressed further down.
Matching Depth Without Guessing
Once undertone is settled, depth is the easier variable, but it is where shoppers often stop too early. US shade ranges are typically described in bands from fair to light, medium, tan, and deep, and most people sit at the edge of two bands rather than squarely inside one.
The standard advice from beauty counters, to “go one shade lighter than you think,” is outdated for full-coverage formulas. A heavier pigment load can oxidize or deepen slightly as it sets, so matching your exact daytime skin tone, rather than intentionally going lighter, tends to hold up better through the day.
A practical method: test two adjacent shades in a thin swatch down the jaw and neck, not the back of the hand, since the neck often reads closer to your true face tone. Let both dry for a full two to three minutes before deciding, since wet foundation almost always looks darker and more matte than it will once it sets. Whichever swatch blends into the neck with the least visible line is the closer match, even if it looked slightly different when wet.
Why Skin Prep Changes Everything
Think of the skin’s surface the way a painter thinks of a wall. Paint applied to a patchy, unprimed wall shows every bump and dry patch, no matter how good the paint is. Foundation behaves the same way on skin that is flaking, under-moisturized, or freshly exfoliated and irritated.
“A formula gets judged for flaws that actually belong to the skin underneath it,” said Dr. Claire Dubois, MD, Board-certified dermatologist. Dry patches grab pigment and look darker and rougher. Overly oily areas can cause the same foundation to slide and separate within hours, even with identical application elsewhere on the same face.
Mayo Clinic’s general skin care guidance recommends moisturizing while skin is still slightly damp from cleansing, which helps the product sit evenly rather than absorbing unevenly into dry zones. Letting a moisturizer or sunscreen absorb for a full two to three minutes before foundation, rather than applying immediately, also reduces the pilling and streaking many people blame on the makeup itself.
This is also where climate matters. Skin that is comfortable in a humid August afternoon on the East Coast can turn tight and dehydrated by January once indoor heating kicks on, and the same moisturizing step that felt like too much in summer becomes essential in winter.
Tools And Technique That Actually Change The Result
A damp makeup sponge, a dense synthetic brush, and clean fingertips will each leave a slightly different finish, and none is universally correct. Fingertips warm the product and can help it melt into skin, which suits lighter layering. A dense brush deposits more pigment quickly, useful for targeted coverage over redness or scarring. A damp sponge, bounced rather than dragged, tends to leave the most natural, skin-like finish because it removes some excess product rather than pushing all of it into the skin.
The mistake nearly everyone makes at some point is applying too much in one layer and then trying to blend it out, which only pushes pigment into fine lines and pores. Building thin layers, letting each one settle for thirty seconds before deciding whether more is needed, gives a more even and more forgiving result, and it uses less product overall.
A quick self-test: after applying, press a clean finger gently into the cheek and release. If a visible imprint remains for more than a second or two, the layer is likely too heavy or was not given enough time to set before powder or blush went on top.
Setting Foundation For Your Actual Climate
Setting powder and setting spray are not interchangeable, and the right choice depends heavily on where you live and what season it is. In humid weather, common along much of the East Coast in summer, a lightweight powder pressed only into the areas that get shiniest, usually the T-zone, holds coverage longer than a heavy all-over dusting, which can look cakey once humidity meets it.
In the dry air that comes with winter indoor heating, a hydrating setting spray, applied in a light mist and allowed to air-dry rather than patted, tends to keep foundation looking fresh rather than emphasizing dry patches the way powder can.
The timing of setting also matters more than most people realize. Setting too soon, before the foundation has had a minute or two to settle into skin, can lock in unevenness. Setting too late, after oils have already started to break through, wastes the powder or spray entirely since it has nothing stable to hold onto.
The Mistakes Behind Orange, Gray, And Cakey Finishes
Oxidation, the process by which a foundation’s pigments darken and often shift warmer after exposure to air and skin oils, is a real chemical reaction, not a flaw specific to any one brand or price tier. “Certain pigment types are simply more reactive to skin’s natural oils than others, and that reaction happens regardless of how much the product costs,” said Dr. James Morrison, PhD, Biochemist. Testing a foundation on the jaw and waiting a full fifteen to twenty minutes before judging the color, rather than deciding in the store, catches most oxidation problems before purchase.
A gray or ashy cast usually means the undertone was mismatched from the start, often because the shade was chosen under artificial light. Flashback, the pale or purplish cast that appears specifically in flash photography, comes from certain light-reflecting ingredients and is worth testing with a phone camera flash before an event, not after.
Cakiness is almost always a layering problem rather than a coverage problem: too much product applied too fast, without letting each layer settle, or powder set on top of foundation that had not yet finished absorbing.
What Matters Versus What Is Marketing
Claims like “24-hour wear” or “transfer-resistant” describe lab conditions that rarely match a real day of eating, talking, and touching your face. They are not meaningless, but they describe a best case, not a guarantee.
Ingredient lists that emphasize a single trending ingredient are also often more about labeling than performance. Coverage and longevity come from the overall formula, not one headline ingredient. The FDA’s public guidance on cosmetic labeling notes that ingredient lists must be accurate but does not evaluate or endorse marketing claims made around them, which is worth remembering the next time a bottle promises something dramatic.
What does reliably matter: how the formula behaves after your specific skin prep, in your specific climate, applied with a technique you have practiced more than once. A foundation tested only once, in a rush, under store lighting, tells you very little. The same foundation tested at home, in daylight, after your usual skin care routine, tells you almost everything.
When To Skip Full Coverage Entirely
Full coverage is not always the right tool. On very dry winter skin, heavy pigment can settle into flaking patches and emphasize texture rather than hide it. On active breakouts, a full layer can trap oil and make inflamed skin look more textured under certain lighting, though this varies by skin and formula.
“Coverage should follow the specific concern, not a general idea of wanting to look flawless,” said Professor Margareta Lindberg, MD, PhD, Dermatologist and researcher. For scattered redness or a few dark spots, targeted concealer over a lighter foundation or tinted moisturizer often looks more natural and takes less time than a full face of heavy product.
A reasonable rule: if you find yourself using a damp sponge for more than a few minutes trying to blend a full-coverage formula into submission, the coverage level itself may be working against you rather than the technique.
Key Takeaways
Full-coverage foundation rewards process more than it rewards any single product decision. Undertone and depth are separate checks, both best done in daylight rather than store lighting. Skin prep changes how any formula performs more than its price point does. Climate should guide whether you reach for powder or setting spray, and technique, especially thin, patient layering, prevents most of the problems usually blamed on the makeup itself.
A Quick Practical Checklist
- Check undertone and depth separately, near a window, not under store lighting
- Test a shade on the jaw and neck, and wait two to three minutes before judging it
- Moisturize while skin is still slightly damp, and let it absorb before foundation
- Apply in thin layers, waiting thirty seconds between each before adding more
- Match your setting method to the season: light powder in humidity, hydrating spray in dry winter air
- Test for oxidation and flash photography before an important event, not the day of
Sources
1. U.S. Food and Drug Administration, Cosmetics Labeling Guide, 2023
2. American Academy of Dermatology, consumer skin care survey findings, 2022
3. Mayo Clinic, general skin care and moisturizing guidance
4. Journal of Cosmetic Dermatology, studies on pigment oxidation and topical film formation
This article is for general information and does not replace personalized advice from a dermatologist or licensed skin care professional.
Individual results vary based on skin type, climate, and application technique.